An important decision to make before proceeding with your
installation is whether you should use the
Existing Installation method, or if you can
use the Demo Installation, which will install
everything for you.
-
Demo Installation - consists of a full
installation of Moodle that installs Moodle itself, the
Purity theme, the blocks, the demo content and the database
data to match our demo layout.
-
Existing Installation - consists of the
packages required to install Purity on an existing Moodle
website (the theme and the
blocks).
Which installation method you should use depends on the
current status of your website. If you are creating
a new Moodle site, we recommend you to
install Purity by using our Demo Installation
package and instructions. If you have
an existing Moodle site, please follow the
Existing Installation instructions.
Also, before proceeding with the installation, please make
sure that you meet the
Moodle requirements.
Demo Installation
The Demo Installation consists of a full installation of
Moodle that installs Moodle itself, the Purity theme, the
blocks, the demo content and the database data to match our
demo layout. Have in mind that as this is a full Moodle
installation it may only be used on a clean server; the
package cannot be installed in an existing Moodle site. It can
only be used when you start a new project/website.
Installing the Demo Installation is a fairly simple process.
It is basically the same procedure as the official
Moodle Migration guide. But anyway, lets write it down with some more details.
1. Create a database (and database user)
You need to create a new database (and associate a database
user with it) for your Moodle installation. It can be named
however you wish.
If you are not sure how to do the above, please contact your
Hosting Support and they will assist you with that.
2. Populate database
Import the SQL file, named
purity.sql (located in the
Demo Installation folder in your theme download
package), into your new database. This can be accomplished via
phpMyAdmin or other DB management tool.
If you are not sure how to do the above, please contact your
Hosting Support and they will assist you with that.
3. Upload files
Upload the purity-demo-files.zip archive
(located in the Demo Installation folder) to your web
server, and extract it using either cPanel or another file
management tool.
Alternatively, you can manually upload the contents of the
uncompressed purity-demo-files.zip archive to
your web server using an FTP client.
4. Upload moodledata
Upload the moodledata.zip archive (located in
the Demo Installation folder) to your web server,
outside your web root. Moodle requires that the moodledata
folder is not publicly accessible.
Once uploaded, extract it using either cPanel or another file
management tool.
Alternatively, you can manually upload the contents of the
uncompressed moodledata.zip archive to your
web server using an FTP client.
Your web server should have read-write permissions to the
moodledata directory. For more details, please check the
official Moodle documentation.
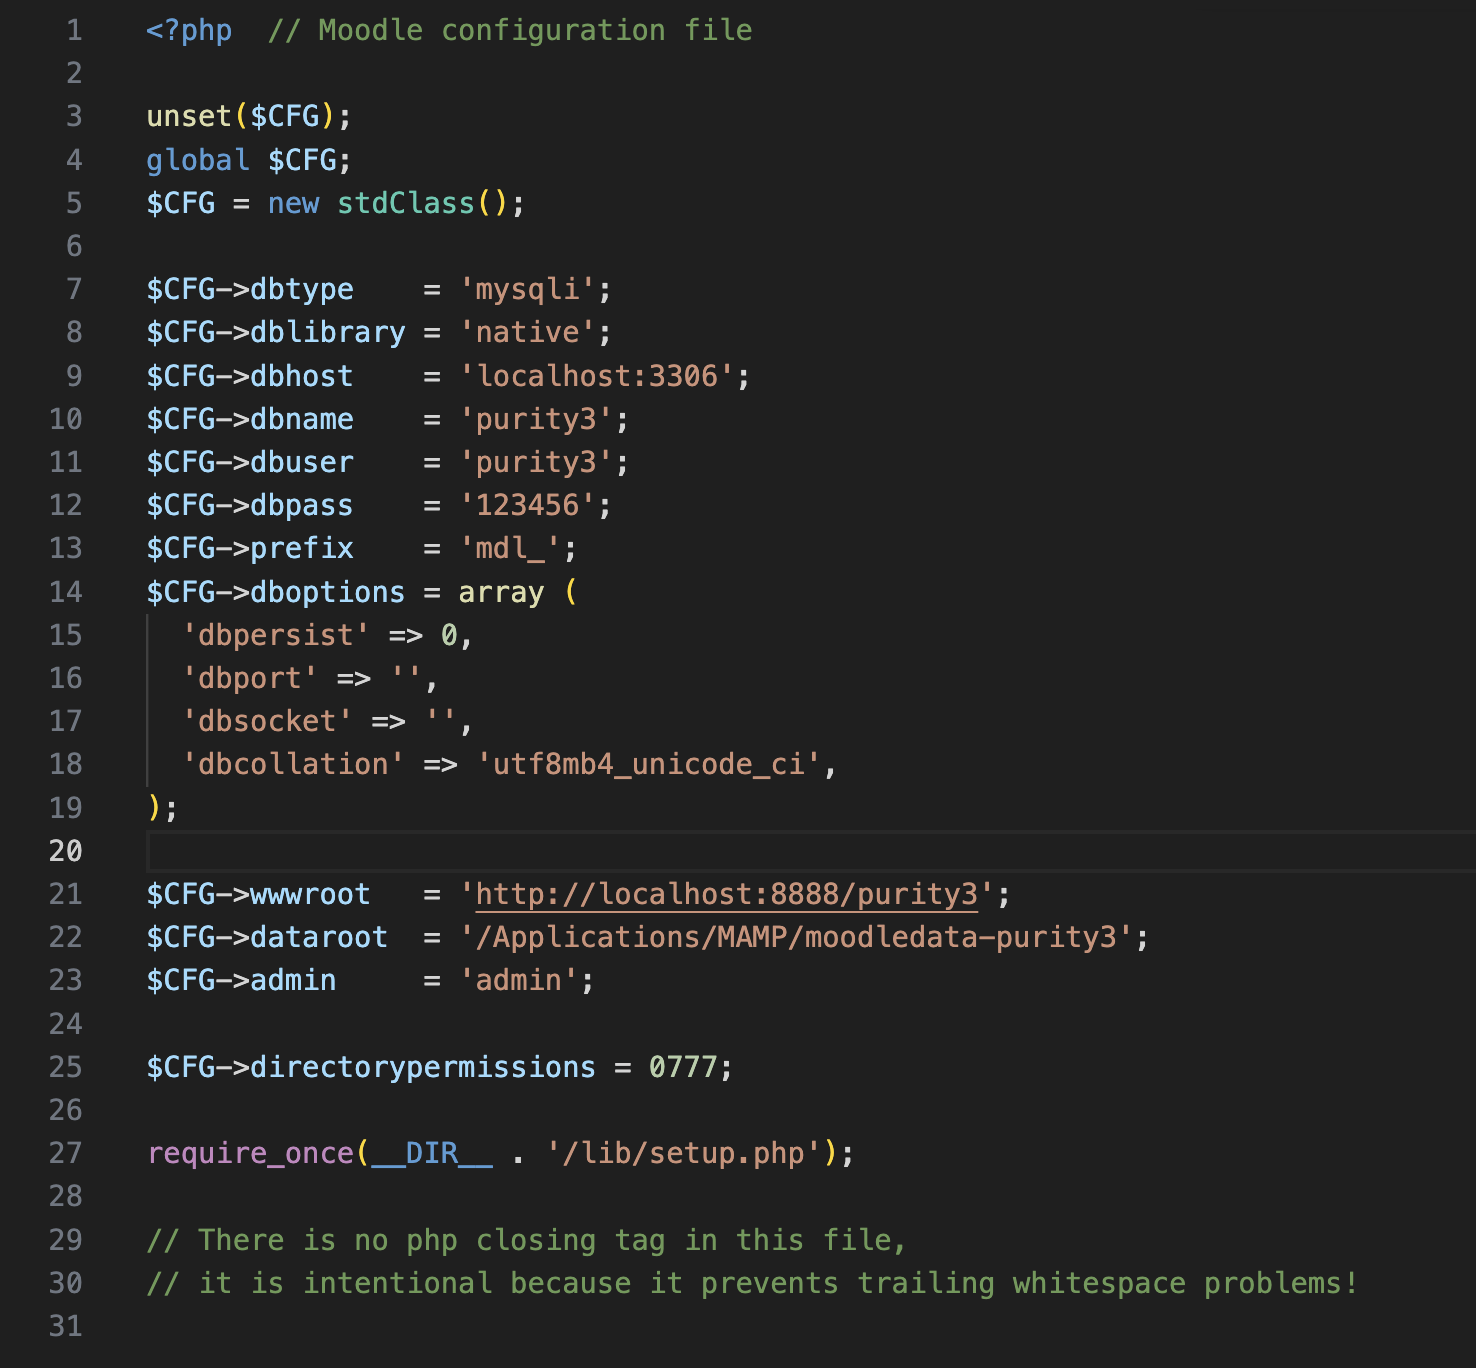
5. Configure config.php
You must now configure Moodle's
config.php file to reflect your new database
credentials and moodledata directory location, so that Moodle
can connect to the database.
It is mandatory to complete all of the following steps, in
order for your website to work properly.
-
Open the config.php file located in the
Moodle root on your web server.
-
On lines 10 to 12, edit the database name,
user, and password to
match the new database credentials you set up in Step 1.
-
Make sure that the database prefix remains as
"mdl_".
-
You may also need to edit the database port and host to
match that of your server, and the database collation to
match that of the new database you created in Step 1.
-
On line 21, change the website root to your website URL, or
your localhost address (e.g. http://localhost/moodle, or
http://localhost:8888/moodle).
If you specify an incorrect web address your website
will not display correctly.
-
On line 22, change the "dataroot" to match the
location of the moodledata directory you uploaded in Step 4.
This path should be relative to your server root.
6. Login
Your Purity demo installation is complete. You can now go to
www.YourSite.com/login/index.php and log in
with the following administrator credentials.
USERNAME: admin
PASSWORD: Admin123!
7. Purge the Moodle cache
After logging in, navigate directly to
www.YourSite.com/admin/purgecaches.php via
your web browser's address bar and click the 'Purge
all caches' button.
Wait for the page to refresh and reload completely. Once the
page has refreshed and loaded completely, the caches have been
succesfully purged.
This process may take several minutes.
Existing installation
The Existing Installation method refers to installing just the
theme and the blocks on an existing Moodle website. This means
you already have a Moodle website with content items, blocks,
plugins, and you just decided that you want to improve its
design and functionality.
Make sure that you have a fresh, working backup of your
existing Moodle website (files and database) before
proceeding.
1. Install the theme
The standalone theme is located in the 'Existing
Installation/theme' folder.
To install the theme:
-
Go to:
Site administration > Plugins > Install Plugins.
- Upload the theme .zip file.
-
Click the "Install plugin from the ZIP file"
button.
You should now have the standalone Purity theme at this
location on your web server:
/theme/purity
2. Install the blocks
Purity comes with many custom blocks to help you create
awesome Moodle websites with ease. It is recommended that you
install all custom blocks.
The blocks are located in the 'Existing
Installations/blocks' folder.
To install the blocks, perform the following steps for each
and every block:
-
Go to:
Site administration > Plugins > Install Plugins.
- Upload the block .zip file.
-
Click the "Install plugin from the ZIP file"
button.
You should now have all the blocks located at
/blocks in your Moodle root.
4. Activate the theme
Navigate to
Site administration > Appearance > Themes > Theme
selector, and change the default theme to Purity.
Upon successful activation, a "New theme saved" page
will be displayed. Click Continue.
5. Configure the theme as it is in the demo
In order to have the same website as the Purity demo you need
to configure the layout as it is in the Demo Installation.
Just install the "Demo Installation" package on
another location, see how everything is configured and then
duplicate it on your original installation.
Almost all elements that you see in the "Demo
Installation" are blocks. Therefore you need to add the
blocks to the layout and configure them as you wish.
Our Purity theme is based on the default Moodle theme - Boost.
It means that whatever you can do in
Boost you can also do in Purity. And the way you
do things in Boost will be exactly the same in
Purity. The way you add blocks in the
Boost theme is how you will add the
blocks in the Purity theme. For more details,
please have a look at
this section
in the official Moodle documentation.
As you know you add the blocks to block regions. The different
themes have different block regions. Please refer to the
"Blocks and regions" section below for more details
about the available regions and how the blocks are configured
in the Purity demo.
For more details on how to edit your Homepage (Front page),
please have a look at
this section
in the official Moodle documentation.
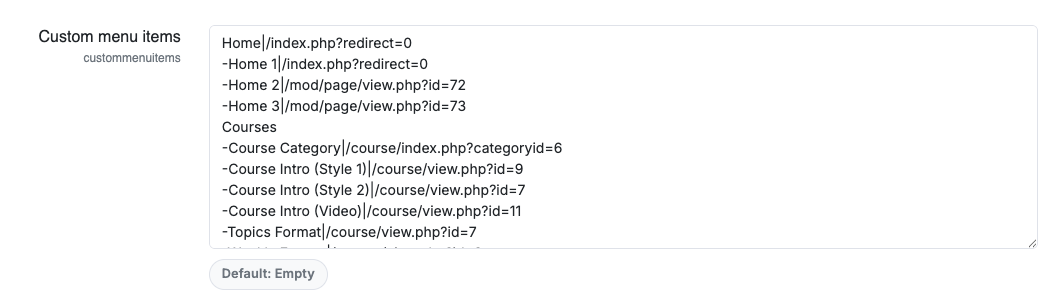
To create a main menu, you need to add items to the Moodle
custom menu.
Navigate to
Site administration > Appearance > Advanced theme
settings > Custom menu items
to configure your main menu.
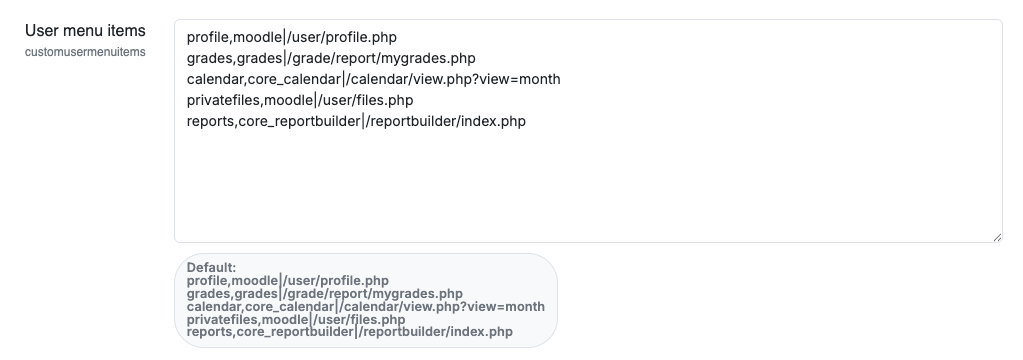
You can also customize the user navigation on the same page.